
The best waterproof tarpaulin for roof protection depends on your timeline and conditions. Polyethylene (PE) tarpaulin works well for emergency short-term repairs lasting several weeks, while PVC tarpaulin is the stronger choice for long-term temporary roofing that must endure months of sun, wind, and rain. Choosing the wrong material or installing it incorrectly can turn a temporary fix into a bigger problem than the original leak.
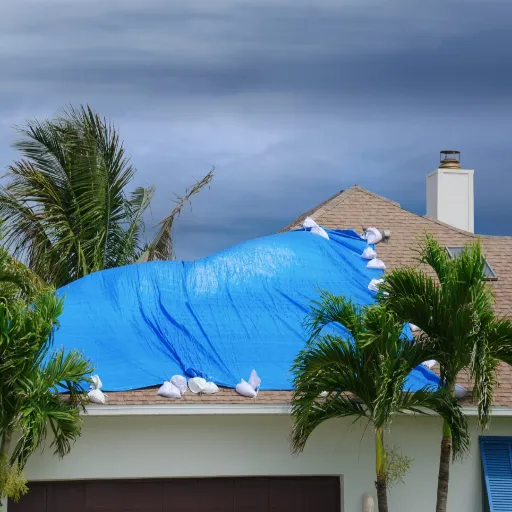
When the monsoon arrived early in Kerala last year, Ravi Menon watched water pour through a puncture in his workshop roof. He bought the first tarpaulin he could find, a thin 90 GSM sheet from a local hardware store, and nailed it flat across the damaged area. Three days later, wind had torn the grommets loose, a pool of standing water had sagged in the centre, and the water damage had spread to three times the original area. Ravi’s mistake was not the idea of using a tarpaulin. It was using the wrong type and installing it the wrong way.
If you are facing a leaking roof, storm damage, or need a temporary roof covering during renovations, this guide will show you exactly how to select, size, and install waterproof tarpaulin that actually protects your building. You will learn which material suits your situation, how to measure and secure it safely, and the common mistakes that cause tarpaulin failure on roofs. We’re here to help! Feel free to contact our team for more information or support.
Key Takeaways
- PE tarpaulin (180-300 GSM) is best for emergency repairs up to 12 weeks; PVC tarpaulin (450-900 GSM) lasts 5-15 years for long-term temporary roofing.
- The sandwich method with wooden battens is the most secure installation technique for pitched and flat roofs.
- Always extend the tarpaulin at least 1 metre over the roof ridge and create slope for water runoff to prevent pooling.
- Wind uplift at grommets and seam failure under ponding water are the two most common causes of roof tarpaulin failure.
What Is Waterproof Tarpaulin for Roof Protection?

A waterproof tarpaulin for roof protection is a heavy-duty flexible sheet, typically made from coated polyethylene or PVC, that is secured over a damaged or exposed roof area to prevent water ingress until permanent repairs can be completed. Unlike water-resistant covers that repel light moisture, true waterproof tarpaulin creates a complete barrier against rain, snow, and wind-driven water.
Waterproof tarpaulin serves several purposes on roofs. It provides emergency protection after storm damage, covers sections under renovation, shields scaffolding and temporary structures, and protects buildings awaiting permanent roofing material. For a broader view of how tarpaulin protects across industries, see our complete guide to tarpaulin uses across industries. It is important to understand that tarpaulin is a temporary solution, not a permanent roofing replacement. Even the highest-quality PVC tarpaulin is designed to bridge a gap, not to serve as a final roof covering for years on end.
The effectiveness of a roof tarpaulin depends on three factors working together. The material must be genuinely waterproof with sealed or welded seams. The size must provide adequate overlap beyond the damaged area. And the installation must create proper tension, secure fastening, and controlled water drainage. When any one of these three factors fails, the tarpaulin becomes more of a liability than a safeguard.
Choosing the Right Waterproof Tarpaulin Material for Your Roof
Not all waterproof tarpaulins perform the same on a roof. The material you choose should match how long you need protection, what weather conditions you face, and how much load your roof structure can bear. Whether you need tarpaulin for roofing emergencies or planned construction cover, selecting the right material is essential. Here are the three main options and when each one makes sense.
PE (Polyethylene) Tarpaulin — Best for Emergency Short-Term Use
PE tarpaulin is made from woven high-density polyethylene fibres laminated with a low-density polyethylene coating. For roof applications, look for a minimum of 180 GSM, though 200-300 GSM heavy-duty PE tarpaulin is preferable for anything beyond a few days.
The strengths of PE tarpaulin are clear. It is lightweight, which means one or two people can manoeuvre it on a roof without specialist equipment. It is fully waterproof when new, provided the seams are heat-sealed rather than stitched. And it is affordable, making it practical for emergency situations where you need cover immediately without a large outlay.
The limitations matter too. Standard PE tarpaulin has a typical outdoor lifespan of 12 to 36 months depending on UV exposure. Without UV inhibitors, the material becomes brittle and cracks, particularly at fold lines. It is also less tear-resistant than PVC, which means grommets can pull through under wind load if not properly reinforced.
PE tarpaulin is best for emergency storm repairs, short-term renovation covers of up to 12 weeks, and situations where rapid deployment matters more than multi-year durability. For emergency roof repair after storm damage, PE is often the fastest option to deploy.
PVC Tarpaulin — Best for Long-Term Temporary Roofing
PVC tarpaulin consists of a polyester scrim base coated with polyvinyl chloride on both sides. For roofing, the typical range is 450-900 GSM, with 610-680 GSM being the most common specification for professional temporary roof installations.
PVC offers significant advantages for longer-term use. The material has superior tear strength and abrasion resistance. Seams can be radio-frequency welded rather than stitched, creating a continuous waterproof barrier with no needle holes. A quality PVC tarpaulin with proper UV stabilisation can last 5 to 15 years in outdoor exposure, depending on climate and maintenance.
The trade-offs are weight and cost. A 20 by 30 foot PVC tarpaulin at 650 GSM can weigh 40-50 kilograms, compared to 8-12 kilograms for the same size in PE. This means PVC usually requires more people or mechanical assistance to install safely. The upfront cost is also higher, though the cost per day of protection often works out lower over time.
PVC tarpaulin is the right choice for construction site temporary roofs, scaffolding covers, planned renovation projects lasting six months or more, and any application where reliability over seasons matters more than ease of handling.
Coated Canvas — When Breathability Matters
Canvas tarpaulin treated with wax or acrylic coatings offers a water-repellent rather than fully waterproof barrier. Its main advantage is breathability, which reduces condensation underneath. For active roof leaks and rain protection, however, canvas is generally unsuitable because it will eventually allow water penetration under sustained rainfall. It is best reserved for sheltered applications where moisture control, not rain blocking, is the priority.
PE vs PVC Tarpaulin for Roofing at a Glance
| Factor | PE Tarpaulin | PVC Tarpaulin |
|---|---|---|
| Typical GSM | 180-300 | 450-900 |
| Weight (same size) | Light | Heavy |
| Waterproof seams | Heat-sealed | RF welded |
| Outdoor lifespan | 12-36 months | 5-15 years |
| Tear strength | Good | Excellent |
| UV resistance | Moderate (with inhibitors) | Excellent (with stabilisers) |
| Cost per square metre | Lower | Higher |
| Best use | Emergency, short-term | Long-term, professional |
For a deeper dive on material specifications and how to choose between PE, PVC, and canvas for any application, see our complete waterproof tarpaulin buying guide.
How to Calculate the Right Size Roof Tarpaulin
Getting the size wrong is one of the fastest ways to waste money and time. When you need a specific dimension, our tarpaulin sheets in custom sizes cover most roof applications. A tarpaulin that is too small leaves gaps for water entry. One that is dramatically too large creates excess material that flaps in wind and collects water.
Measuring Simple Roofs
For a single-pitch or rectangular roof section, measure the length and width of the area that needs cover. Then add at least 1 metre of overhang on every side. This overhang is not optional. It provides the material you need to wrap around battens, create secure fastening points, and ensure water does not creep in at the edges.
If your roof measures 5 metres by 8 metres, you need a tarpaulin of at least 7 by 10 metres. For the ridge line on a pitched roof, extend the cover at least 1 metre over the ridge on both sides so water running down the slope cannot get underneath.
Measuring Complex Roofs
For L-shaped roofs, multi-pitch structures, or irregular shapes, break the roof into rectangular sections. Measure each section separately and add the overhang. You may need multiple tarpaulins with overlap between them rather than one oversized sheet. For large or irregular roofs, a continuous tarpaulin roll may provide better coverage with fewer seams.
When multiple tarpaulins are used together, overlap them by at least 50 centimetres along the seam where they meet. Position the upper tarpaulin so water runs over the overlap rather than into it, the same principle as overlapping roof tiles.
Accounting for Slope and Runoff
On flat roofs, the biggest risk is water pooling. A flat-installed tarpaulin acts like a swimming pool liner. You must create slope, either by installing the tarpaulin at an angle or by building up one side with additional material or battens so water drains toward a gutter or safe edge.
For pitched roofs, the slope itself helps drainage. But you still need to ensure the tarpaulin follows the pitch smoothly without wrinkles or air pockets where water can collect.
How to Install Waterproof Tarpaulin on a Roof
Proper installation matters as much as proper material selection. Knowing how to install tarpaulin on a roof correctly can mean the difference between a dry building and escalating water damage. Here is a quick overview of the roof tarp installation process before the detailed breakdown:
- Prepare the roof surface — clear debris and smooth sharp edges.
- Position the tarpaulin — extend at least 1 metre over the ridge on all sides.
- Secure with the sandwich method — wrap edges around wooden battens and fasten to the roof structure.
- Create water runoff — ensure slope so water drains, never pools.
- Inspect and test — check for light gaps inside and leaks after rainfall.
Follow the detailed steps below for safe, secure waterproof tarpaulin for roof installations. A premium PVC tarpaulin installed flat and loose will fail faster than a basic PE tarpaulin stretched tight and secured correctly.
Safety First
Before you begin, check the weather forecast. Never work on a roof in rain, high winds, or thunderstorms. Use a stable ladder with someone holding the base. Wear non-slip footwear and consider a safety harness on steep or high roofs. If the damage is extensive or the roof is structurally compromised, call a professional.
Step 1: Prepare the Roof Surface
Clear debris, loose shingles, nails, and branches from the damaged area. Smooth any sharp edges or protrusions that could puncture the tarpaulin. If there is a large hole, cover it with plywood first to create a flat surface and prevent the tarpaulin from sagging into the void.
Step 2: Position the Tarpaulin
Unfold the tarpaulin on the ground and identify the direction it will lay. Carry it up carefully, keeping it folded or rolled until you are on the roof to avoid wind catching it. Position it so it extends at least 1 metre over the ridge and has equal overhang on all sides.
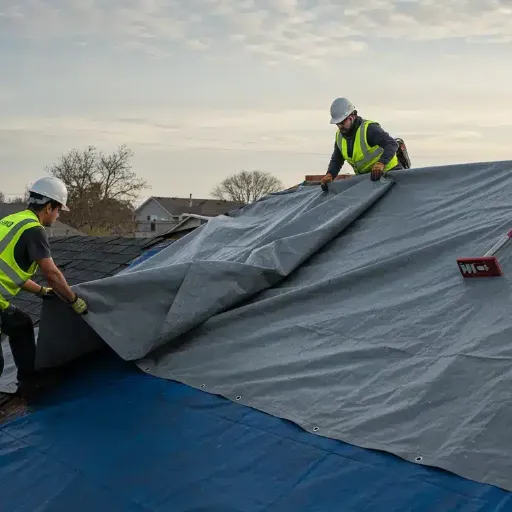
Step 3: Secure with the Sandwich Method
The sandwich method is the most reliable way to fasten tarpaulin to a roof. Lay wooden battens or 2-by-4 boards along the edges of the tarpaulin. Wrap the tarpaulin edge around each batten, then fasten the batten to the roof with galvanised nails or screws driven into solid structural members, not just shingles.
This method distributes tension evenly along the edge and prevents the tarpaulin from tearing at fastening points. Do not nail directly through the tarpaulin fabric. That creates holes that leak and weak points that tear under wind load.
Step 4: Create Proper Water Runoff
Ensure the tarpaulin is taut and follows the roof slope. On flat roofs, build a slight slope with additional battens or padding under one side. Water must have a clear path to drain. Any depression or wrinkle will become a collection point.
Step 5: Inspect and Test
Once installed, check from inside the building during daylight. Look for pinpricks of light coming through, which indicate gaps. After the next rainfall, inspect the interior for any signs of moisture. Address leaks immediately with additional fastening or seam sealing tape.
Have inquiries? Reach out to us, and we’ll be happy to assist you with any concerns.
Securing Techniques for Different Roof Types
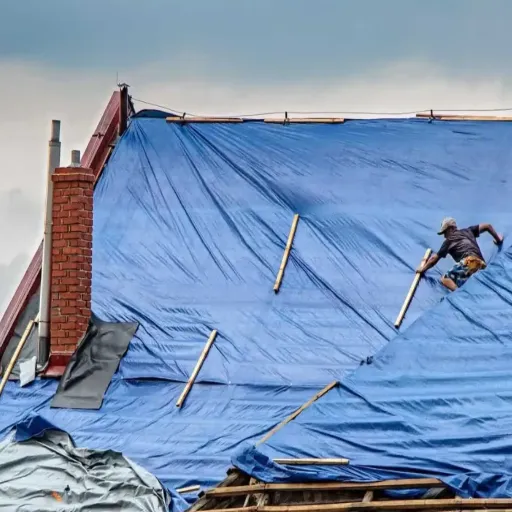
Pitched Roofs
Pitched roofs benefit from gravity-assisted drainage. Secure the top edge first over the ridge, then work downward, pulling the tarpaulin taut as you fasten each side. Use the sandwich method along the eaves and gable ends. Anchor ropes to stable points like chimneys or vent stacks if additional wind resistance is needed. These techniques apply to both emergency roof repair situations and planned temporary roof covering installations.
Flat Roofs
Flat roofs are the most challenging because water has nowhere to go naturally. In addition to creating artificial slope, consider installing a central drain hole with a collar that channels water through the tarpaulin into the roof’s existing drainage system. Alternatively, use a weighted perimeter system with sandbags on top of the sandwich battens to prevent wind lift without penetrating the roof membrane.
Tile and Shingle Roofs
On tiled roofs, slide the top edge of the tarpaulin under the row of tiles two rows above the damage. This tucks the tarpaulin under the natural water flow path. Use the sandwich method along the lower edges, fastening into the roof battens beneath the tiles rather than the tiles themselves.
Metal Roofs
Metal roofs can be slippery and harder to fasten into. Use magnetic anchors where possible, or fasten sandwich battens into the roof purlins with self-tapping metal screws. Be careful not to over-tighten and deform the metal panels.
How Long Can Waterproof Tarpaulin Last on a Roof?
Lifespan depends on material, climate, and installation quality. Here are realistic expectations.
A PE tarpaulin in a temperate climate with moderate UV exposure typically lasts 12 to 24 months on a roof. In tropical or high-UV regions, that can drop to 6 to 12 months without adequate UV inhibitors. In cold climates with snow load, the material may become brittle and crack in freezing temperatures.
A PVC tarpaulin with proper UV stabilisation typically lasts 5 to 10 years in temperate conditions and 3 to 7 years in tropical or high-UV zones. The welded seams usually outlast the material surface, though UV degradation of the coating can lead to surface cracking before the structural scrim fails.
Warning signs that your roof tarpaulin needs replacement include visible thinning or translucency in the material, cracks or crazing in the surface coating, torn or stretched grommets, seam separation, and water pooling that did not occur when the tarpaulin was new.
Common Mistakes That Cause Roof Tarpaulin Failure
Learning what not to do can save you from the problems that catch most people out.
Insufficient overlap at the ridge. If the tarpaulin does not extend far enough over the roof peak, wind will drive rain underneath the top edge. Always allow at least 1 metre of overhang on both sides of the ridge.
Flat installation with no runoff slope. A tarpaulin laid flat acts as a basin. On a flat roof, 25 millimetres of standing water adds approximately 25 kilograms of load per square metre. That weight can strain both the tarpaulin and the roof structure beneath it.
Grommet tear-out from wind flapping. Loose material vibrates in wind, creating a whipping motion that tears grommets and enlarges holes. The tarpaulin must be stretched tight. If it drums or flutters in a breeze, it is not tight enough.
Using undersized material. A tarpaulin that just barely covers the hole leaves no margin for error. Wind shifts the material. Water finds the gaps. Measure generously and add overhang.
Ignoring UV degradation. All plastic materials degrade in sunlight. Even UV-treated waterproof tarpaulin for roof use has a finite lifespan. Inspect the installation every three to six months and replace at the first sign of surface breakdown.
Cost Guide: Roof Tarpaulin Materials and Installation
Understanding costs helps you budget appropriately and avoid overpaying for unnecessary features or underpaying for inadequate protection. Remember that tarpaulins manufactured to strict quality standards typically outperform budget alternatives in lifespan and reliability. The total investment in waterproof tarpaulin for roof protection should include not just the material cost but also the value of preventing further water damage to your building.
DIY material costs for PE tarpaulin range from approximately 0.10to0.40 per square foot depending on GSM and features. A standard 20 by 30 foot heavy-duty PE tarpaulin typically costs 30to120. PVC tarpaulin costs more, ranging from 0.50to1.50 per square foot, with a 20 by 30 foot sheet at 650 GSM costing 300to900.
Professional installation costs vary by region and roof complexity. According to HomeGuide, standard professional roof tarping runs 0.70to2.00 per square foot. Emergency after-hours service can range from 1.00to2.80 per square foot, with total jobs often falling between 250and1,000 depending on roof size and access difficulty.
When you frame cost as cost-per-day of protection, the picture changes. A 60 PE tarpaulin that lasts 90 days costs about 0.67 per day. A 500 PVC tarpaulin that lasts 5 years costs about 0.27 per day. For anything beyond a short-term emergency, the higher upfront investment in PVC often pays for itself.
Frequently Asked Questions
Can I use waterproof tarpaulin as a permanent roof?
No. Tarpaulin is designed as a temporary protective measure, not a permanent roofing solution. Even high-quality PVC tarpaulin will eventually degrade under constant UV exposure, thermal cycling, and weathering. Plan for permanent repairs as soon as conditions allow.
What GSM tarpaulin is best for roof protection?
For emergency short-term use, 200-300 GSM PE tarpaulin is adequate. For long-term temporary roofing, 450-650 GSM PVC tarpaulin is the professional standard. For extreme conditions with heavy snow load or high wind, consider 800-900 GSM PVC.
How do I stop water pooling on a flat roof tarpaulin?
Create artificial slope by building up one side with battens or rigid foam, or install a central drain collar that channels water through the tarpaulin into the existing roof drainage. Never leave a tarpaulin perfectly flat on a flat roof.
Can I install roof tarpaulin without nails?
Yes. Sandbags, weighted boards, ratchet straps anchored to stable structural points, and self-adhesive tarpaulin systems can all secure a roof cover without penetrating the roof surface. These methods are particularly useful on metal roofs or membrane roofs where punctures must be avoided.
Will insurance cover roof tarpaulin installation?
Most homeowners and property insurance policies cover emergency tarping as part of storm damage mitigation. According to the Insurance Information Institute, the average water damage claim from roof leaks exceeds $11,000, making temporary tarping a cost-effective preventive measure insurers typically recognise. Document the damage with photographs before and after tarping, and keep receipts for materials or professional services.
How do I repair a small tear in a roof tarpaulin?
Clean the area around the tear thoroughly and allow it to dry completely. Apply tarpaulin repair tape designed for the specific material, PE or PVC, pressing firmly to eliminate air bubbles. For larger tears, use a patch of matching material with adhesive on all edges. Repair tape is a temporary fix. Plan to replace the tarpaulin if tears are frequent or extensive.
What colour tarpaulin is best for roofing?
Light-coloured or silver reflective tarpaulin reduces heat buildup underneath, which is beneficial in hot climates and helps prolong the material’s lifespan. Dark colours absorb more heat, which can accelerate UV degradation and create hotter conditions beneath the cover. For most roof applications, silver or white is preferable to blue, green, or black.
What is the best tarpaulin for roof leak emergencies?
The best tarpaulin for roof leak emergencies is a heavy-duty PE tarpaulin of at least 200 GSM with reinforced edges, heat-sealed seams, and UV inhibitors. It is lightweight enough to deploy quickly, fully waterproof when new, and affordable enough to keep on hand before storm season arrives. For larger leaks or extended protection, upgrade to 610 GSM PVC tarpaulin with welded seams.
How do you secure waterproof tarpaulin on a roof in high winds?
In high winds, the sandwich method with wooden battens is essential. Space battens every 60-90 centimetres rather than only at the edges. Add rope anchors to chimneys, vent stacks, or other stable points. Keep the tarpaulin stretched drum-tight so it cannot flap. The ASCE 7 wind load standard recommends that roof edge zones experience 2-3 times higher wind pressure than the field area, so reinforced edges and closer fastening are critical in exposed locations.
Conclusion
A leaking roof demands fast action, but fast action only helps if it is the right action. The right waterproof tarpaulin for roof protection starts with matching the material to your timeline. PE tarpaulin gives you affordable, lightweight coverage for emergencies and short-term repairs. PVC tarpaulin delivers the strength and longevity needed for construction sites, renovation projects, and any situation where temporary cover must hold for seasons rather than weeks.
Beyond material choice, success comes down to measurement, installation, and maintenance. Size generously with at least 1 metre of overhang on all sides. Install using the sandwich method with wooden battens to distribute tension and prevent tear-out. Create slope for water runoff, especially on flat roofs. And inspect the installation regularly, replacing the tarpaulin at the first sign of material fatigue.
Whether you are a homeowner facing an emergency leak, a contractor protecting a renovation, or a facilities manager planning temporary cover, the principles are the same. Choose the right material, install it correctly, and treat it as temporary protection that buys you time to make permanent repairs.
If you need waterproof tarpaulin for roof protection, explore our range of PE and PVC tarpaulins in standard and custom sizes. Our team can help you select the right GSM, dimensions, and features for your specific roof application. Contact Linyi Chenlai Plastic Products Co., Ltd. today for a quote.


