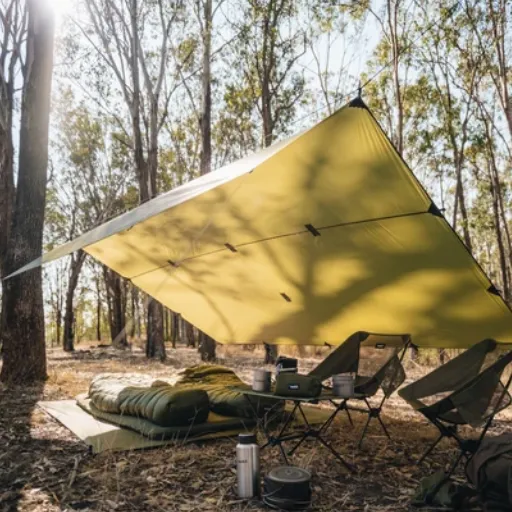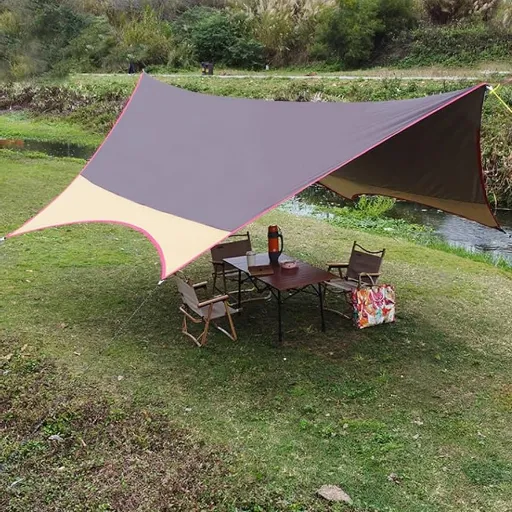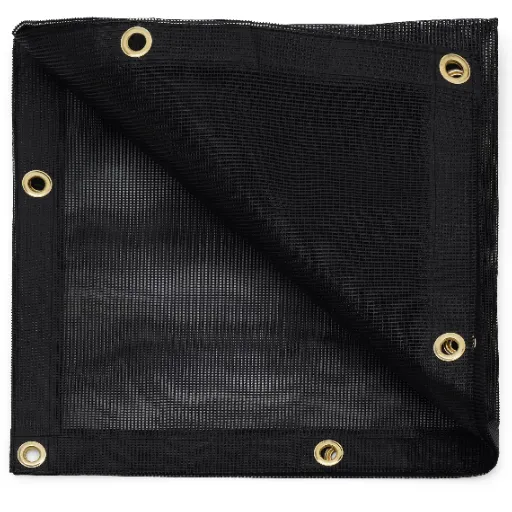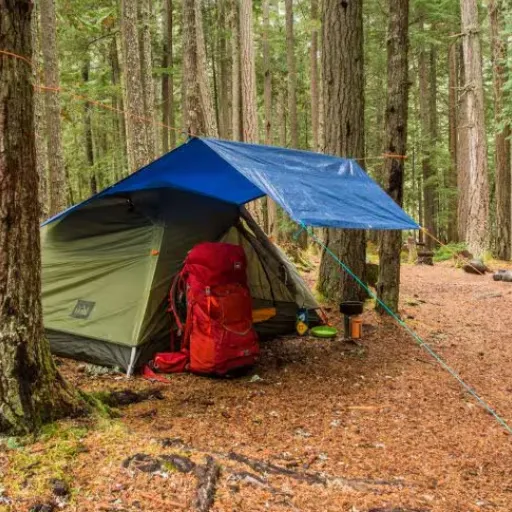
Most tarp failures are setup failures, not material failures. A tarpaulin shelter that leaks, collapses, or floods your sleeping bag is almost always the result of a slack ridgeline, a pitch that is too flat, or a site that drains poorly. This guide shows you how to set up a tarpaulin shelter for camping the right way, with exact heights, angles, and steps you can follow on your first night out.
The problem with most camping tarp setup advice is that it says “pitch it tight” and then stops. Tight to what height? At what angle? With how many stakes? We manufacture waterproof tarpaulins for camps and outfitters in more than 50 countries, so we have watched thousands of tarps go up in every kind of weather. In this guide, you’ll learn the gear you need, the five knots that matter, the eight-step A-frame method, six configurations for different conditions, and how to fix the seven most common setup mistakes.
Contact Linyi Chenlai Plastic Products Co., Ltd. for reliable waterproof tarp solutions tailored to your needs.
Key Takeaways
- A tarpaulin shelter fails because of setup errors, not material failure. Slope and tension matter more than fabric strength.
- Pitch your ridgeline at 120-150 cm (4-5 ft) for fair weather and 45-60 cm (18-24 in) for storms, with panels at 45-60 degrees.
- Learn five knots: bowline, taut-line hitch, trucker’s hitch, prusik, and clove hitch. They cover every anchoring situation.
- The A-frame is the most weather-resistant pitch and the best place to start. Practice it at home before your first trip.
- Set up with daylight to spare, stake corners at 45 degrees, and re-tension 30 minutes after pitching to prevent overnight sag.
What You Need Before You Set Up
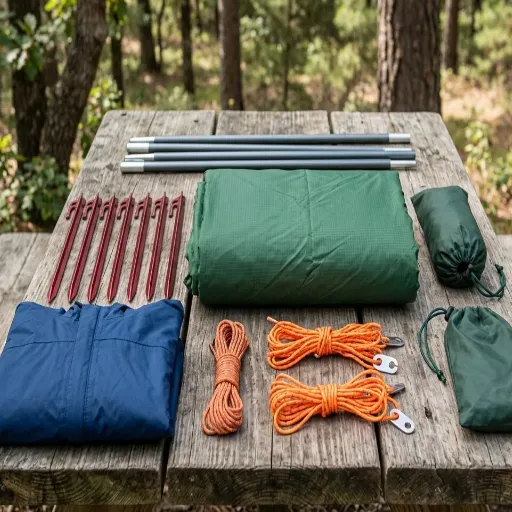
A successful camping tarp setup starts with the right gear. You don’t need much, but every piece has a job.
- Tarpaulin. Choose a waterproof tarpaulin with reinforced corners and grommets spaced close enough to give you anchoring options. If you are deciding which material or size to buy, read our complete tarpaulin for camping guide first. It walks through PE, PVC, silnylon, and the right sizes for solo, couple, family, and group use.
- Cordage. Carry about 15 metres (50 ft) of paracord for the ridgeline and guy lines. Paracord stretches slightly, which is useful because it lets you re-tension a pitch that sags overnight.
- Stakes. Bring at least eight. Use longer, wide-flanged stakes for sand or snow, and Y-beam stakes for rocky ground. Cheap shepherd’s hooks bend and pull free in wind.
- Poles. Trekking poles or dedicated tarp poles replace trees when you camp above the treeline or in open meadows. A couple of sturdy sticks work in a pinch.
A lightweight tarpaulin replaces a tent that weighs several times more. On a backpacking trip, that weight saving is the whole point. For car camping and family trips, weight does not matter, and a heavier-duty tarpaulin gives you better wind resistance and a longer life.
If you are still choosing between materials, our waterproof tarpaulin specifications guide explains the differences in depth. For now, focus on the setup process itself.
How to Choose a Campsite for a Tarpaulin
Site selection decides half the battle before you touch a stake. Look for three things: drainage, anchors, and wind.
Drainage. Choose high, level ground that slopes slightly away from where you will sleep. Avoid low spots and valley bottoms, where cold air pools and rainwater gathers. Crouch down and look across the ground surface before you pitch. A depression that looks flat standing up becomes a puddle under your sleeping bag after rain.
Anchors. A tarpaulin needs something to tie to. Two trees spaced 3-4 metres apart work best for an A-frame. If you camp where trees are scarce, plan to use trekking poles instead. Open meadows and ridgelines with no anchor points are the hardest places to pitch a tarp.
Wind. Note the prevailing wind before you commit. Orient the closed back or low side of your pitch toward the wind so gusts push the tarp down rather than lifting it. Wind funnels through saddles, along lakes, and up valleys, so a calm spot at sunset can turn breezy by midnight.
Safety. Check for dead or broken branches overhead. Falling limbs, known as widow-makers, are the real danger in any tarp camp. Also avoid setting up under slopes where runoff will channel through your site after heavy rain.
For a deeper look at how tarpaulins are used beyond shelter, browse our guide to tarpaulin applications.
Set Up Your Ridgeline, the Foundation of Every Tarp Shelter
Every reliable tarpaulin shelter starts with a ridgeline. This is the cord that runs between your two anchor points and carries the weight of the tarp. Get it right and everything else follows.
How high should a ridgeline be? For fair weather, tie the ridgeline at 120-150 cm (4-5 ft). This gives you headroom, airflow, and a broad covered area. For storms, drop it to 45-60 cm (18-24 in) so the tarp sits low and sheds wind instead of catching it. A ridgeline that is too high in bad weather lets wind-driven rain in under the sides.
Tension is everything. The ridgeline should be drum-tight, so tight that it hums when you pluck it. A slack ridgeline means a sagging tarp, pooling water, and a wet night. Use a trucker’s hitch on one end to gain three-to-one pulling power and crank the line tight.
Protect the trees. Never wrap bare cord around bark, which damages the tree. Use a 2.5 cm (1 in) tree strap, or at minimum pad the cord with a strip of cloth.
If you attach the tarp to the same lines your hammock hangs from, the tarp will go slack the moment you climb in, because hanging in a hammock shortens the distance between the trees. Use a separate ridgeline for the tarp instead. Contact Linyi Chenlai Plastic Products Co., Ltd. for reliable waterproof tarp solutions tailored to your needs.
5 Knots Every Tarp Camper Should Know
You do not need a dozen knots. These five cover every anchoring and tensioning situation you will meet.
- Bowline. Creates a fixed loop that will not slip. Use it to attach cord to a tree, a tarp corner, or a stake. It’s easy to untie even after heavy load.
- Taut-line hitch. An adjustable friction knot. Tie it to a stake, and you can slide it to tension or loosen a guy line without retying. This is your main camping tarp setup knot.
- Trucker’s hitch. A pulley-like knot that gives three-to-one mechanical advantage. Use it on the ridgeline to get a drum-tight pitch that a plain knot cannot achieve.
- Prusik knot. A friction hitch that grips a line but slides when you want it to. Use two of these to attach the tarp to the ridgeline and slide it into position.
- Clove hitch. A fast, simple tie-off for attaching cord to a pole, stake, or tree. It is not self-tightening, so pair it with a half-hitch to lock it.
Practice these knots at home before your trip. Tying them in the dark, in the rain, with cold hands is a different skill. A few minutes in the backyard saves you a frustrating evening in the field.
How to Set Up a Tarpaulin Shelter for Camping, the A-Frame Step by Step
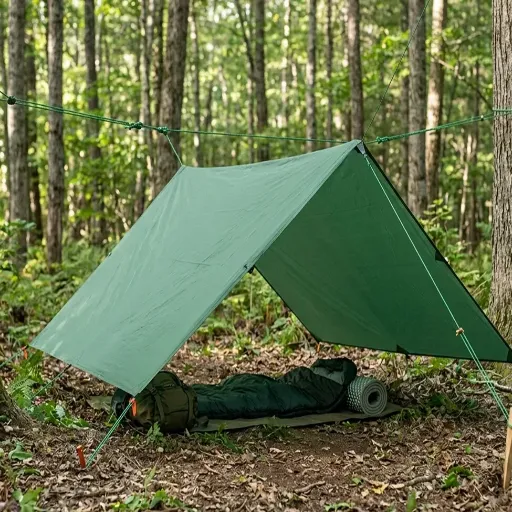
The A-frame is the most weather-resistant pitch and the best place for beginners to start. Here is the complete eight-step camping tarp setup for an A-frame, from site selection to final tension.
- Choose and clear your site. Find two trees 3-4 metres apart on level, well-drained ground. Clear sticks, pine cones, and sharp stones from the sleeping area.
- Tie your ridgeline. Attach one end to the first tree at 120-150 cm. Run the cord through the centre grommets of the tarp, then tie the other end to the second tree using a trucker’s hitch. Crank it drum-tight.
- Drape and centre the tarp. Throw the tarp over the ridgeline so it hangs evenly on both sides. Adjust until both halves are equal.
- Attach the tarp to the ridgeline. Use prusik knots or small carabiners at the centre tie-outs so the tarp stays in place and you can slide it to centre it.
- Stake the corners. Pull each corner outward at a 45-degree angle and drive the stake in at 45 degrees, pointing away from the tarp. Drive it at least 8 cm (3 in) deep, more in soft ground.
- Add mid-panel guy lines. If your tarp has tie-outs along the edges, guy them out as well. This stops the sides from flapping and keeps rain from pooling in the fabric.
- Tension everything drum-tight. The fabric should be taut enough that you can flick it and hear a drum-like sound. Any sag will collect water. Water weighs about 3.8 kg (8.3 lb) per gallon, and a heavy pool can tear a grommet.
- Test for drainage. Pour water over the top or wait for light rain. Watch for low spots where water pools, then adjust stakes or the ridgeline to create slope.
The A-frame is also the pitch shown in most tarp shelter setup videos, so it is easy to find a visual reference if you get stuck.
Mini-story: When Liam tried his first tarpaulin shelter on a damp weekend in the Peak District, he pitched the ridgeline at head height and pulled the corners only finger-tight. At 2 a.m., the centre of the tarp sagged under a pool of rainwater. The weight tore a grommet and dumped cold water onto his sleeping bag. The next morning he re-pitched with a trucker’s hitch, a lower ridgeline, and 45-degree corners. The same tarp has since seen 30 dry nights.
Tarp Configurations for Every Weather Condition
The A-frame is not the only option. The same tarpaulin can become six different shelters depending on how you fold, stake, and prop it.
- A-Frame. Drape over a ridgeline and stake both sides. The most weather-resistant shape. Pitch low for storms, high for airflow.
- Lean-To. Stake one long edge to the ground and raise the opposite edge with poles or a tree. Great for shade, wind protection, and an open view. Less storm-proof than the A-frame.
- Plow Point, or Flying Diamond. Stake three corners and lift the fourth with a trekking pole. Fast, efficient, and surprisingly storm-resistant. Good for solo emergencies.
- Diamond Pitch. Tie one corner to a tree at chest height and stake the opposite corner, spreading the other two wide. Minimalist, quick, and popular with hammock campers.
- Half-Pyramid. Fold a rectangular tarp to create a closed back and sloped roof. Strong choice for wet-weather solo camping.
- Dining Fly, or Flat Pitch. Stretch the tarp flat above a table or cooking area using poles and guy lines. Needs careful tensioning and a slight slope. Best for group camps and basecamps.
For detailed guidance on pitching each configuration, backpacking publications like Backpacker.com cover the basics well. Their approach is aimed at ultralight hikers, but the geometry is the same for any tarp.
How to Set Up a Tarp Shelter Without Trees
When trees are unavailable, your trekking poles become the anchors. The method below works for the A-frame and the plow point.
Trekking-pole A-frame. Lay the tarp flat with its long axis perpendicular to the wind. Stake the two windward corners first, tight and low. Set a trekking pole at the centre of one short end, tip through the tie-out loop, and adjust to about 120 cm. Repeat at the other end to create a ridge. Stake the remaining corners, then add a guy line from each pole tip to a stake about a metre out to stop the poles tipping inward.
Single-pole pyramid. Stake three corners of a square tarp and lift the fourth corner with a trekking pole. This creates a small pyramid shelter that sheds wind well. It is a fast emergency option with no trees needed.
Vehicle anchoring. At a car camp, you can tie one side of the tarp to the roof rails or door handles of your vehicle and stake the opposite side. This gives car campers an instant shaded or dry area beside the vehicle.
Setting Up a Tarpaulin for Hammock Camping
A tarpaulin over a hammock needs more coverage than a ground pitch because wind-driven rain comes from the sides. Follow these rules for a dry night.
Use a separate ridgeline. If the tarp hangs from the same lines as the hammock, it goes slack when you sit down. A separate ridgeline keeps the tarp tensioned regardless of your weight.
Size for diagonal coverage. An 11×11 ft or 12×12 ft square tarp pitched as a diamond covers a hammock’s full diagonal. Anything smaller leaves your ends exposed in blowing rain.
Set the ridgeline below the hammock straps. Tie the tarp ridgeline slightly lower than the hammock attachment height so the tarp hugs the hammock ends. This blocks the rain that would otherwise blow in through the gap.
Stake the sides in storms. In heavy wind, stake the tarp sides close to the hammock and add extra guy lines. The hammock community has refined these techniques over years of field testing, and their forums are a useful reference for advanced setups.
Storm Pitches for High Wind and Heavy Rain
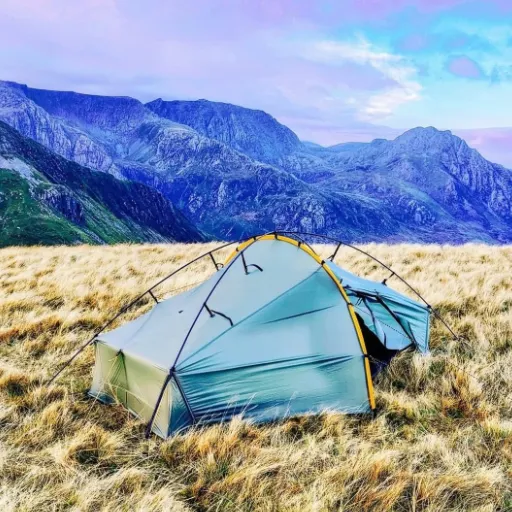
When the forecast turns nasty, change your pitch before the weather changes. These storm techniques keep a tarpaulin shelter intact.
Drop the ridgeline. Lower the ridgeline to 45-60 cm so the tarp sits close to the ground. A low, steep profile sheds wind instead of catching it.
Stake the windward side flat. Pull the windward edge all the way to the ground and stake it. Even a few centimetres of clearance lets wind get under the tarp, turning it into a wing that can rip stakes out.
Add deadman anchors. In soft ground, sand, or snow, bury a 30 cm stick horizontally under each critical stake and tie the guy line to it. A buried anchor holds far better than a stake in loose soil.
Tie drip lines. Water runs down guy lines and straight into your shelter. Tie a short piece of cord around each guy line just inside the tarp edge so water drips off before reaching your sleeping area.
Plan for limits. Sustained winds above about 40 km/h (25 mph) call for a storm pitch. Above 65 km/h (40 mph), a tarpaulin approaches its structural limit. In those conditions, use a vehicle, building, or natural windbreak instead.
Common Camping Tarp Setup Mistakes and How to Fix Them
Even experienced campers make these errors. Here is how to spot and fix each one.
- Water pooling. A flat or sagging tarp collects water. Fix it with slope and tension. Raise the ridgeline or centre pole and pull all edges tight.
- Sagging at night. Many fabrics stretch when wet, so a tight pitch at 8 p.m. droops by midnight. Plan a tighten cycle 30 minutes after pitching. Polyester-based tarps resist wet sag better than nylon.
- Flapping guylines. If the tarp flaps and pops in wind, the guy lines are slack. Re-tension every stake and add mid-edge guy lines.
- Torn grommet. When a grommet fails, wrap a small pebble in the tarp corner and tie your guy line around it. This field fix holds until you can repair or replace the tarp at home.
- Ridgeline too high. If rain blows in under the tarp, drop the ridgeline and steepen the pitch.
- Groundsheet sticking out. A groundsheet that extends beyond the tarp funnels rain underneath you. Keep it inside the footprint.
- Setting up too late. Start with at least an hour of daylight left. Rushed evening pitches are the source of most of these mistakes.
If you camp in exposed places or wet climates, a heavier tarpaulin resists wind better because it is stiffer and does not stretch as much. Explore our heavy-duty tarpaulin range for options built for repeated rough-weather use.
Setting Up Large Tarpaulins for Groups, Camps, and Basecamps
Group camping changes the equation. A scout troop, summer camp, or festival basecamp pitches many tarps at once, and they need a system, not a one-off setup.
Dining flies. A 16×20 ft or larger tarpaulin pitched as a dining fly needs a centre pole and corner poles, all guyed out. Plan the pole placement before you lift the tarp, and tension the corners evenly so the fabric does not sag between the poles.
Standardise sizes. Choose two or three standard tarp sizes for different uses, rather than a unique size for every shelter. This simplifies replacement and storage across the season.
Colour-code your fleet. Assign different colours to dining shelters, first-aid stations, and storage. A quick visual check tells leaders which tarp is which, even across a busy campsite.
Order custom when it pays. Camps that equip dozens of patrol sites often save money with custom-sized tarpaulins ordered in bulk. We build custom tarpaulins to exact dimensions with the grommet spacing and colour options your programme needs.
Frequently Asked Questions
How many stakes do I need for a tarp shelter?
Bring at least eight. A basic A-frame uses six. A storm-ready setup with mid-edge guy lines can use twelve or more.
Can I set up a tarpaulin without trees?
Yes. Use trekking poles to create the ridge, or anchor one side to a vehicle. Methods for both are covered above.
How do I stop water pooling on a flat tarpaulin?
Create tension and slope. Raise the centre and pull all edges tight. Any sag becomes a water trap.
What is the best knot for a tarpaulin ridgeline?
Use a trucker’s hitch on the far end for tension and a bowline on the near end. For adjustable guy lines, use a taut-line hitch.
Is a tarpaulin as warm as a tent?
No. A tarpaulin does not trap body heat the way a tent does. In cold weather, use a warmer sleeping bag and a groundsheet, or add a bivy.
Do I need a groundsheet under a tarpaulin?
Yes, for sleeping. Use a separate groundsheet or footprint, and keep it inside the tarp’s footprint so rain runs away from it, not onto it.
Conclusion
A reliable camping tarp setup comes down to five habits: choose a drained site, set a drum-tight ridgeline at the right height, pitch the configuration that matches the weather, tension every corner at 45 degrees, and fix problems before they become emergencies. Most tarp failures are setup failures, which means they are preventable.
Start with the A-frame and practice at home. Add the lean-to and plow point as you gain confidence, and learn the knots until they are second nature. Within a few trips, a tarpaulin shelter will go up in minutes, and you’ll carry far less weight in exchange for a dry, comfortable night.
Once you have practised this camping tarp setup a few times, the whole process takes minutes. Ready to find the right tarpaulin for your next trip? Browse our range of waterproof tarpaulins, or contact us for a custom quote if you are equipping a camp, troop, or outdoor programme. We ship to customers in more than 50 countries and build tarpaulins to last season after season.